UPDATE 20210516
An easy way to push your work to your GitHub account:
- Create a repo on your GitHub account
- Open the local folder with Git bash, if you are under a Windows environment; for Linux and mac, ignore this
git initinitiate your repogit add .add all files to a staging areagit commit -m "your comment", if you typegit committhen you will enter theviminterface, typeito enter the editing mode, typeescto quit the editing mode, type:wqto save and quit theviminterface in Windowsgit remote add origin your-repo-linkcopy and paste the repo link showed in the GitHub, this step is to connect your local folder to the remote GitHub repogit push -u origin masterpush the file to the remote repository
Here are some other notes:
- If there are already some files in your repo and you want to upload your local files to the same repo, then try
git pull origin masterfirst. If succeed, try push again; if fail, trygit pull --rebase origin masterand then push again - If you forked someone’s repo to your GitHub, then the commits you made within that repo will not be calculated as your contribution. To make your contribution visiable, you can copy and push them to another repo you created
This blog will only introduce some basic and necessary knowledge about git and Github.
Why I choose Github?
With the second wave of COVID-19 in Canada, I believe WFH would be a normality, even in the future. To cooperate with other people in a project, especially for data scientist or computer engineer, Github is an efficient and easy way to achieve it. And I guess this is one of the reasons why it becomes so popular in recent years. For myself, there is another objective reason: I often use Dropbox to restore some necessay files that I need in many devices, like my phone, pad, laptop and PC, but the free storage is too limited (2.25GB). I believe the same issue also appears in other cloud storage software more of less, if you are a personal user and don’t hope to spend extra money over the cloud storage, like me. According to this answer, Github now allows each repository up to 100GB, but each single file cannot exceed 100MB.
To use Github, git is an important tool you have to learn. Now, let me introduce some common commands.
TO BE CONTINUED
Common Git Commands
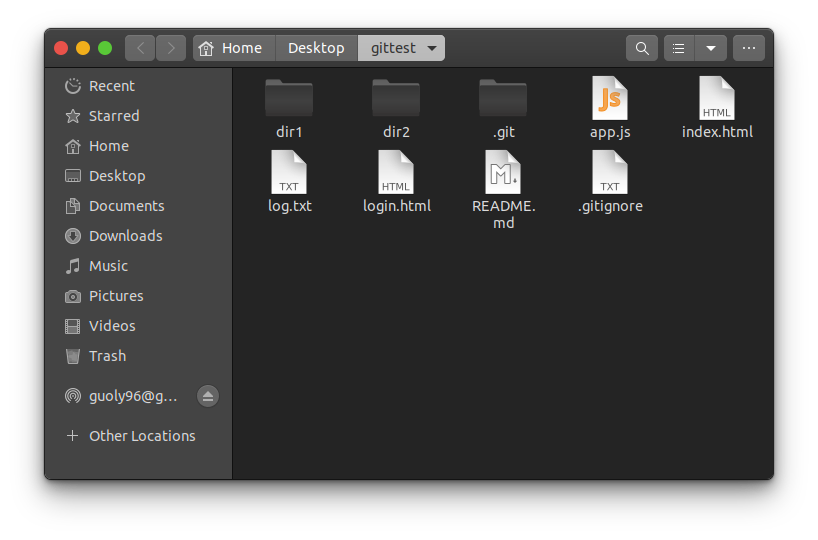
Let’s suppose we want to upload an existing file folder gittest to Github as a repository now.

git init
$ cd /file/path/to/repository
# change your current directory to the file path where the file folder `gittest` is
$ git init
# initialize an empty git repository
Now, you have already finished the first step! If you look at our folder gittest, hit ctrl+H, you will see a new but hidden folder .git.
git add & git commit
The next step is to add and commit gittest to github.
$ git add .
This will add all files in the folder gittest to a staging area before committing, which is what I used most so far. You can also use $ git add <file name> to add a specific file.
After adding, we just need to commit them:
$ git commit -m "your comment w.r.t. the change"
commit -m is one of the most used commit commands. Refer to this link for more info.
git push
The last step is to push them to a remote repository in your Github account. To do that, you first need to create a repository in Github.

Then just type the name you want and create. (We shall ignore the other setting (README, .gitignore, …) at first.)
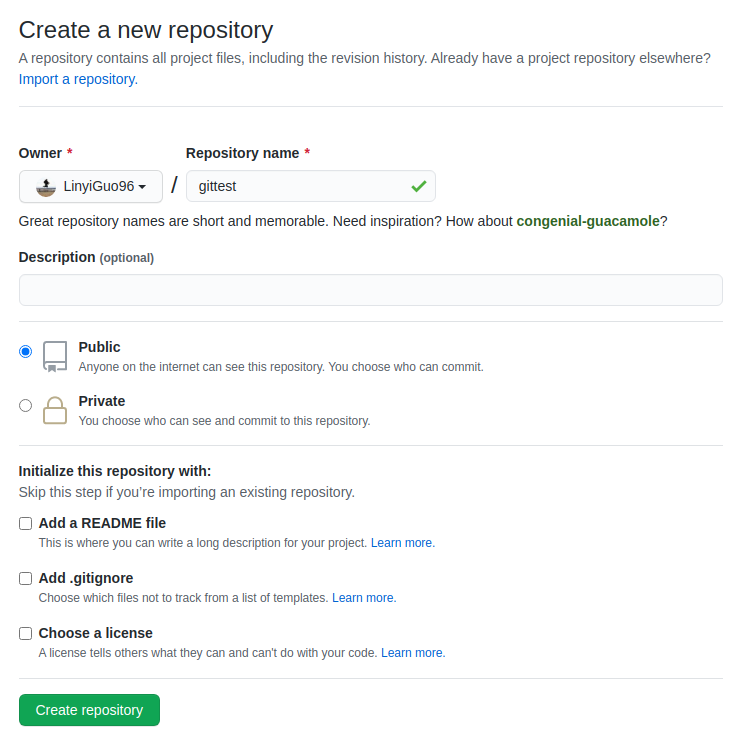
Great! Now you just need to copy the line with the beginning $ git remote add origin ... and run it in your terminal.

Finally, let’s push your file online! Run:
$ git push
Now if you refresh your repository page, you will find your files appear there!

git clone & git pull
After pushing your project to Github, people (including yourself) can usually download it to a new machine with $ git clone command. If you allow someone to access your repository, then the changes they make is also visible to you. But if you don’t allow them to access (which is the default setting), they will not be able to edit it unless fork your repository to their account, but in this case, their changes won’t influence your repository at all.
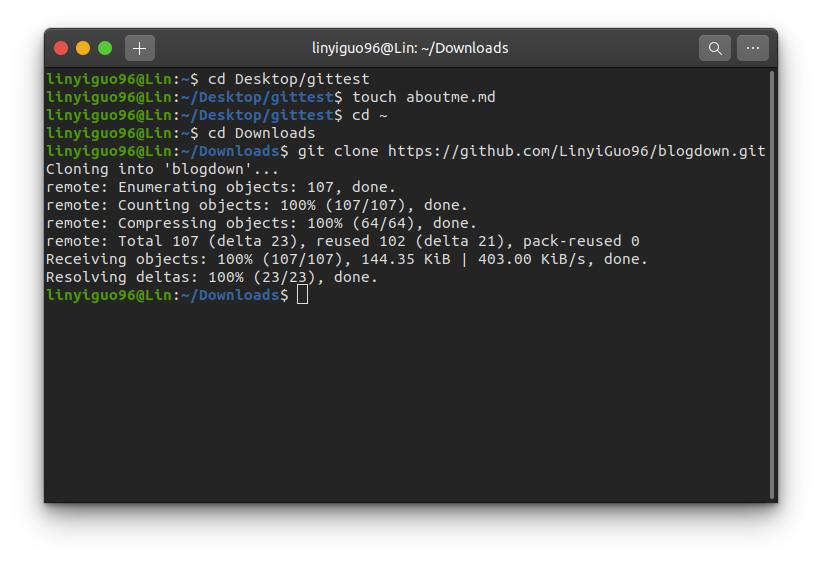
To clone a repository, you first need the link of your desired repository at first. Now suppose we want to clone the repository blogdown, click code and copy the link.

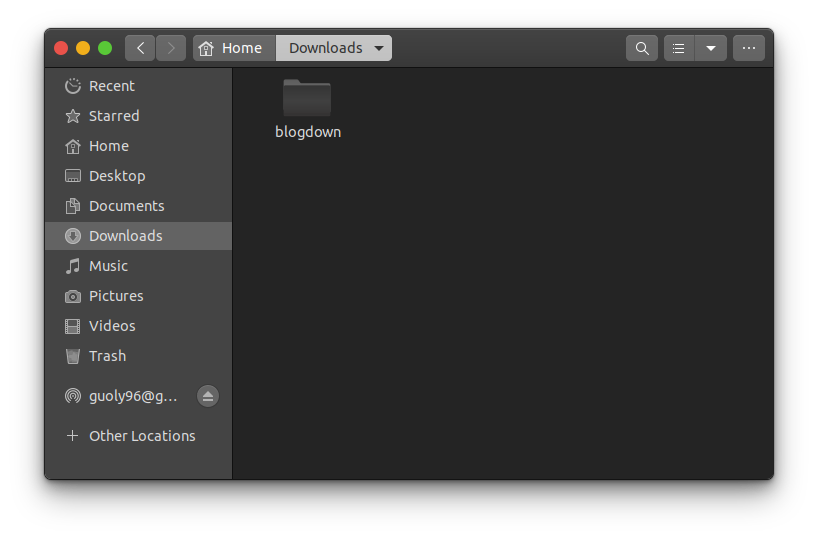
Then cd to the file path where you want to store it, and clone! Then you will find there is a new folder named blogdown in the file path you chosed.
Since other people can edit your repository, if you guys are working on the same project together, then it’s necessay to keep your file up-to-date. To achieve that, you can pull the latest repository from the Github.
$ cd /file/path/to/repo
$ git pull
Then you are good to go! Remember to add, commit and push after making changes :)
git status
I have to say $ git status is a very useful command when working with remote code hosting platform like Github. You can run it every time when you add/commit your local repository. It will tell you the changes you made and whether there is anything you need to notice before commit/push.
$ git status
touch
OK, we have already covered most of the necessary commands used in Github. Now suppose you want to use command to build a new file in your local repository, again, use cd to change to your local repository and then use $ touch to create the file you want like following:
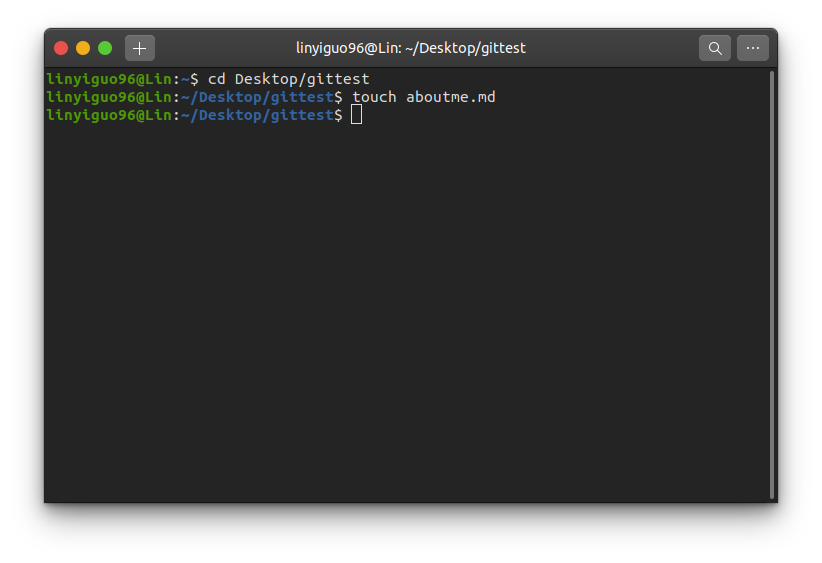
Then you will see there is a new file named aboutme.md in your folder! But also, you could create a file or copy one from somewhere to your folder directly.

TO BE CONTINUED
Here are some useful links:
- Download Git
- Register Github
- Github official Docs
- A useful video for beginners:
